Wednesday, July 16, 2014

Tomatillo Salsa for fish tacos

1 lb Tomatillos
1/4 small jalepeno
2 Tbsp apple cider vinegar
1/4 tsp pepper
1/2 tsp salt
pinch of rosemary
1/4 tsp minced garlic
10 sprigs cilantro of italian parsley
1 TBSp olive oil (optional)

Friday, June 20, 2014

FISH STYLE VEGETARIAN TACOS


You're going to like these. Trust me. I ran out of fish one night and figured I could sub some seasoned black beans. They turned out so delicious. I hope you find them as awesome as my family did. 


Step 1:  Prep your white flour corn tortillas by placing them in a skillet with a damp flour sack towel. 

FISH STYLE VEGETARIAN TACOS

The other night I ran out of fish and realized it as I was starting to assemble all the ingredients together for my fish tacos. I had actually made the sauces earlier that day so I was totally bummed to find no fish in the freezer. Well, I did find a can of black beans (which I always keep in my pantry for situations like this) and figured I was sub those for the fish. They were delish! So here are my instructions for some amazing fish less fish tacos. I have to apologize that the pictures aren't pretty. I was so hungry I couldn't wait to eat them.


Step 1 : Prep your white corn tortillas by putting them in a skillet with some damp flour sack towels. You can buy those here if you are interested. 

Tuesday, May 13, 2014

Panera Mac 'n Cheese

If any of you have had Panera Mac 'n Cheese, you'll know exactly why I have to share this recipe. Periodically they will put their recipes on their website for a day so I grabbed this one while it was "up for grabs." 
Try it out and let me know what you think. If you are not completely taken over by it's creamy goodness, than I'm going to form a very strong opinion about you. Okay, not really, but you get the picture on how awesome this is. 


1 16-ounce Package package of Rigati pasta (or other small pasta shells)
1/4 cup butter
1/2 cup all-purpose flour
2 1/2 cups milk (2% or whole)
6 Slices white American cheese (chopped)
8oz extra-sharp white Vermont cheddar (shredded)
1/2 tablespoon Dijon mustard
1 teaspoon kosher salt
1/4 teaspoon hot sauce

Step 1
Prepare pasta according to package directions.
Step 2
Melt butter over low heat. Whisk in flour and cook 1 minute, whisking constantly.
Step 3
Gradually whisk in milk; cook over medium heat, whisking until mixture thickens and bubbles. Remove from heat.
Step 4
Add cheeses, mustard, salt, and hot sauce, stirring until cheese melts and sauce is smooth.
Step 5
Stir in pasta and cook over medium heat for 1 minute (or until thoroughly heated). Serve immediately.

I actually omitted the hot sauce the second time around because I thought it was too much. I'm not a fan of mustard either, but I think it gives it a bit of the zing this mac and cheese needs. So instead I used about 1/2 tsp of mustard powder. 


Cous Cous Salad

This salad is not an original. I don't know where it came from, but when it hits my plate, I know exactly where it is headed. My mouth. Pictures to come soon. 


Chopped Salad with Chicken, Couscous, & Vegetables Recipe 
  
Dressing:
 1 cup (packed) fresh basil leaves
1 cup mayonnaise
1 shallot, halved
1 cup buttermilk
1 Tablespoon fresh lemon juice

Blend basil leaves, mayonnaise, and shallot in processor until smooth.  Gradually blend in buttermilk and lemon juice.  Season dressing to taste with salt & pepper.
(Can be made 1 day ahead. Cover and refrigerate.)

Salad:
 1/3 cup grated Asiago cheese
1/3 cup dried currants
1/3 cup shelled pumpkin seeds
1 – 10oz. package plain couscous, cooked according to package instructions. (about 5 cups)
3 cups baby arugula
2 cups grape or cherry tomatoes, sliced in half
2 cups fresh corn kernels (from about 2 ears)
2 cups shredded chicken
Toss all ingredients together with dressing.

Wednesday, April 30, 2014

HOW TO CLEAN A CAMELBAK TUBE FOR UNDER $2.00

My family is planning a trip to Moab Utah. I checked the weather forecast and it's going to be in the upper 80's and lower 90's. So I pulled out the old hydration pack. I try to clean and dry this the best I can after every use, but apparently I didn't do a good enough job last time. While the bladder was fine, the tubing had just a hint of something foreign (I'm not sure what, but  it wasn't supposed to be in there). So I took a trip to the craft store and purchased a clearance package of pipe cleaners ($.49 normally $.99) and a 1/4 inch wooden dowel ($.49). Brilliant idea, I know, since the cleaning kit for these things is about $15-$20.  The rest is pretty self explanatory, but if you can't figure it out, watch the youtube video I've attached. 


For disinfecting I've read that you can use bleach (yucky taste), mouth wash (which can leave a little minty flavor), or vodka or other high proof alcohol. 

To help make your water not taste like bad plastic, I suggest putting a tiny bit of gatorade or lemon juice in the bladder. You need just enough to take the taste away- I'd say maybe 1-3 tablespoons depending on the size of your bladder. 

Thanks for watching. Happy climbing, or hiking, or biking or whatever you do with your hydration pack. 

Sunday, April 27, 2014

CITRUS QUINOA SALAD


I originally got this recipe from the food network's website so I can't claim full responsibility for this fantastic salad. I have, however, improved on the original to make it taste even better. If you want to see The Food Networks version you can find it here.   I think you'll like mine more. 


Citrus Quinoa Salad

1 cup quinoa (uncooked)
1 1/4 cuP chicken stock
1 green onion (white part only)
1/2 cup craisins
1/4 cup  toasted pine nuts
1 Tbsp rice vinegar
1/2 cup fresh orange juice
1/2 tsp orange zest
1 Tbsp olive oil
1/8 tsp (pinch) of cumin
1/2 cucumber, peeled, seeded, and chopped
1/4 cup italian parsley 
(or substitute 1/8 cup fresh basil 1/4 cup parsley)
1/4 tsp salt
freshly ground black pepper

Place the quinoa in a fine mesh strainer or chinois and rinse under cold water until the water runs clear. Bring the chicken stock to a boil and then add quinoa. Return to a boil and then reduce the heat to low. Cover and simmer until the quinoa is fluffy. This takes about 20 minutes. Once quinoa has fully expanded, place it in a cooking tray and  refrigerate it until it's cool. 

In a small mixing bowl, soak the cranberries in the orange juice. 

In a separate bowl mix together the green onions, vinegar, zest, oil, cumin, cucumber, parsley, salt, and pepper. 

When the quinoa is cooled, mix the craisins and orange juice into the dressing and then mix the dressing into the quinoa. Mix in the pine nuts.  I also squeeze more orange juice on the top of the salad because I can't get enough of the awesome citrus taste.

Enjoy! 


Creamy Black Bean Salsa

I don't know where my mom got this recipe, but I'm glad she shared it with me. It is beautiful and fantastic! 


1- 15 oz can black beans (drained and rinsed) 
1 1/2 cup frozen white corn (thawed)
1 cup finely chopped sweet red pepper
1/2 cup finely chopped red onion
1 Tbsp chopped fresh italian parsley
(my mom uses cilantro but I don't like cilantro so I substituted parsley)
1/2 cup sour cream
1/4 cup plain yogurt
2 Tbsp red wine vinegar
1 tsp ground cumin
1 tsp chili powder
1/2 tsp salt
1/4 t garlic powder
1/8 tsp (on a pinch) of pepper

Combine the sauce by mixing the parsley, sour cream, yogurt, vinegar, cumin, chili powder, salt, garlic powder, and pepper together first. Then mix it into your veggies. I think it tastes better if you let it refrigerate at least 1 hour, but it is fantastic right off too. 

Serve with corn tortilla chips. 

________________________________________________


Sunday, March 30, 2014

Strawberry Freezer Jam (lower sugar)

I used to make strawberry jam and it always turned out. I'm not sure what has happened, but I have lost the touch and have not been able to obtain a good set lately. So I started trying different types of pectins and followed the instructions to the T. The jams were still coming out very soft. So I just decided to play around one night with a different kind of pectin and I got it right the first time! I tried it again to test it, and it set very nicely the second time. Here are the instructions for my fool proof strawberry freezer jam.

2 cups blended strawberries
1 cup sugar
1/4 cup water
1/3 cup instant pectin (see picture below)

1- Blend your strawberries on the ice crush. This makes it so there is less air incorporated and will yield less froth.

2- In a bowl combine the strawberries and sugar. Mix it up and let it sit for about 5 minutes or so.

3- Add water and pectin to a pan and bring to boil. Let it boil for about 1 minute.

4- While on the stove top on your lowest medium heat, add about 1 cup of the strawberry mixture to the pectin and mix it until there are no lumps. Then pour the pectin mixture into the rest of the strawberries. Mix it well.

5- Pour into freezer containers and let sit on counter uncovered until it is cooled down. I waited until I could see the jam setting up, then I put them in the freezer.

This stays in the fridge for a couple of weeks, and in the freezer for probably up to 6 months. It never lasts that long in my house.


OIL PULLING AND RASPBERRY JAM

Tonight I was online watching youtube videos and I came across an oil pulling segment. Let me preface my next statement by saying that I am not one of those people who put much stock in the "there is an oil for that" mentality. If it works for you, great. I'm not willing to pay extremely overpriced product unless I know it is going to work. So, back to youtube. I watched the video and thought, what the heck! I am making raspberry jam tonight and it will probably take as much time to make the jam as is will to oil pull. So I tried it.
I thought I would document the pulling and perhaps try it for about 1-2 weeks (if I can make it that long) and see if there were any noticeable results.

Night 1 (3/29/14)

THE PULLING

I used about 2 tsp of Trader Joes coconut oil because I had it in the pantry. I swished it while I made my jam. The timing worked out perfectly. About 20 minutes to do both.

RESULTS

I read online that people found immediate results. While I don't think that my mouth felt more fresh than a visit to the dentist could ever provide (yes, that was one story), I did notice a slight whitening in my teeth. Now perhaps this is all mental. Maybe I should try taking a pre and post picture next time.

One thing that I was apprehensive about prior to trying this is having a oily residue left in my mouth after spitting the oil out. This was not the case. It felt just like spitting water out.

More to come.


Night 2 3/30/14

Doesn't my jam look yummy. It set up so nicely. I am so excited to have a almond butter and raspberry jam sandwich.


THE PULLING

I used the same amount of oil as last night. I did swish less because I was doing a face mask at the same time and it kind of hurt to move my face. I think it is better to pull while doing something (like making jam or doing a facial), otherwise it is kind of gross swishing oil around in my mouth for 15-20 minutes

RESULTS

After expectorating the oil out in the garbage, I swished tap water around in my mouth. Then I brushed my teeth with my regular toothpaste.  My teeth do appear to be whiter. My plan is to have my husband take a sniff of my breath tomorrow morning and to access if I've got morning breath. I saw on one website that oil pulling cures bad breath. We will see about that.


Tuesday, February 25, 2014

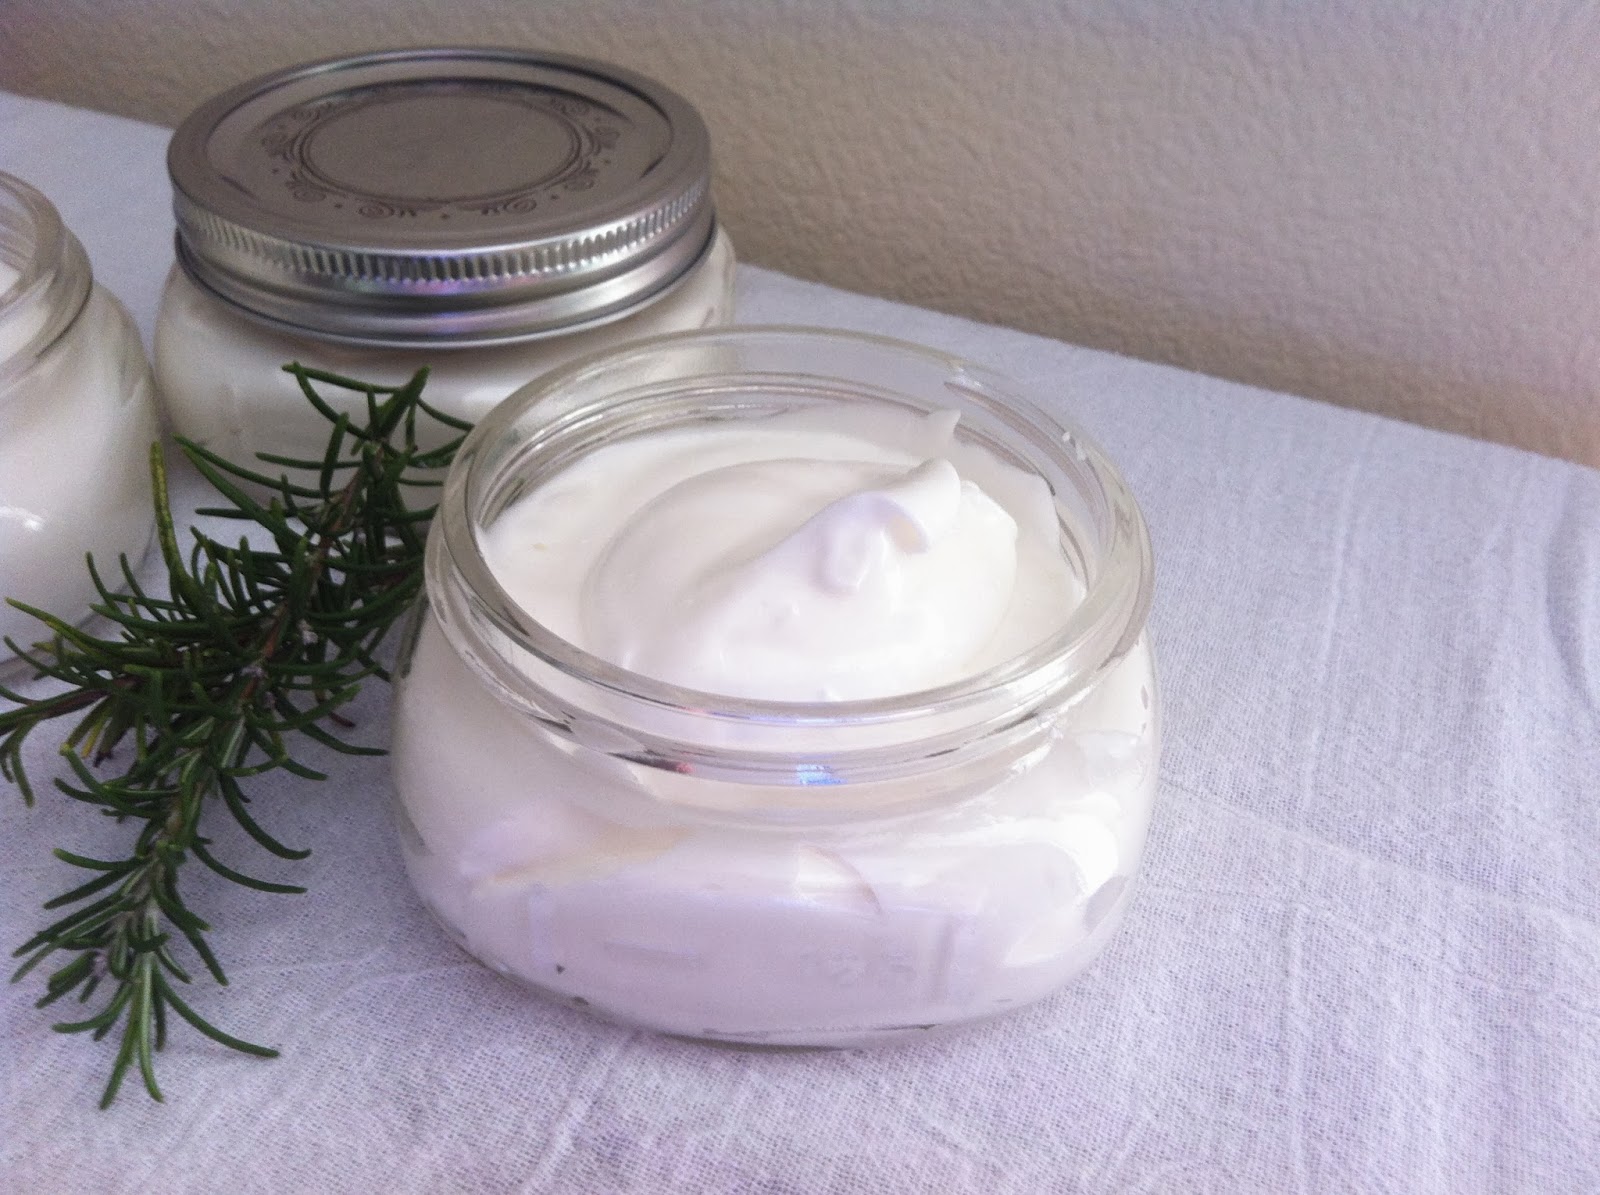
Rosemary Eucalyptus Massage Mousse


Today I'm posting a recipe of one of my favorite concoctions I have come up with yet. This is such a versatile blend. I started using it as a homemade shaving cream for those areas that leave razor burn hoping that it would soothe. It did.  Then I started whipping it and made it into a massage mousse. Now I use it to help clear up my toddler's eczema. It has worked wonders on her skin!  This is quite oily so I wouldn't suggest using it in place of lotion.  So here it the recipe. I hope you enjoy it!


1/3 cup coconut oil
1/2 cup shea butter
1/8 cup jojoba oil
1/8 cup sweet almond oil
1/4 teaspoon Rosemary oil
1/4 teaspoon Eucalyptus oil
1/8 teaspoon Tea tree oil (this is optional)

Melt all ingredients in a pan over low heat on the stove. Let it solidify overnight or put it in the fridge for faster results. Once the oils have solidified, whip the mixture with a hand mixer until soft peaks form and it is light and fluffy.  Transfer the mousse into containers. I use 8 oz ball canning bottles because they aren't very deep and it makes it so I don't have to dig and get my whole hand oily when I want a little bit. On that note, this is quite oily so I would not suggest using it in place of lotion.

This can be stored at room temperature, but if it does melt, all you need to do it stick it back in the fridge and re-whip it if you want it fluffy.


Here is a picture of what the soft peaks look like (if you're not a cook or baker this term may not be familiar).


Soft peaks                                                            Finished product

I got my coconut oil from Target. I prefer to use their's because it is expelled oil which means that it doesn't have any scent of coconut. I have also used Trader Joes before and theirs still has a hint of coconut scent, which isn't entirely unpleasant. I think it does take away from the minty scents of the tea tree oil and rosemary though.

Here is a picture of all the products I used minus the coconut oil. It wouldn't fit in the picture.


Smoothie Popsicles


If any of you have a child that is a picky eater, you will appreciate this recipe. My 4 1/2 year old has been extremely "selective" (that's my positive word for it) since he turned about 18 months. One morning I decided I needed to add some greens to his smoothies so he wouldn't turn opaque from iron deficiency. He didn't love it, but he actually drank it. He loves any kind of popsicle, so I got the brilliant idea to make his smoothies into popsicles. He loves them! So here are a couple of good recipes.


Berry Smoothie Popsicles

1/2 banana
1 Orange juice
1 Mango
1 cup Blueberries (I use frozen)
1 cup Strawberries
1 - 1 1/2 cups honey flavored greek yogurt
1 cup Purple kale or spinach

1- Blend the juice, banana, and kale/spinach together until there are no specs left.
2- Add the rest of the ingredients and blend until smooth
3- Pour into popsicle containers and freeze.

* If you want to get the this-tastes-like-dirt-it-must-be-healthy taste out, try blanching your greens prior to blending. This will remove some of the nutrients though.

* you can substitute 1/2 cup orange juice and 1 cup Mango Naked drink if you don't have a mango.


What little boy can resist a popsicle? He asks for these all day long. I don't mind giving them to him for breakfast, lunch, dinner, or any time in between!


Island Strawberry Daiquiri Popsicles

1/2 cup coconut milk or juice
1 cup kale or spinach
1 cup fresh pineapple
1 cup strawberries
1 6 oz container of coconut flavored yogurt
1/2 banana
a squeeze of fresh lime juice

Blend the kale/spinach with the liquids first before adding everything else to the blender.  Pour into popsicle containers and freeze for about 3 hours.


Sunday, February 2, 2014

Berry Lemonade Bread

This is a work in progress, but I thought I would post it in case some one else wants to help with the progress!  My mom used to make a lemon bread when I was a kid and I remember waiting for the goodness to enter my mouth. I have adjusted the recipe to make it more dense. I hope you enjoy it.

4 Tbsp butter
1/2 tsp salt
1 cup sugar
2 eggs
1 1/2 cups flour
1 tsp baking powder
1/2 cup milk
1 lemon with rind grated
1/2 cup frozen berries (I use raspberries and blueberries)

Cream together butter, salt and sugar. Add eggs and lemon rind and mix until evenly incorporated. Mix your baking powder in with your flour and make sure it is mixed so there are not lumps for baking powder. Add milk and flour mixture and fold very lightly. Then fold berries until barely mixed. You want to do this step very lightly. It doesn't matter if the batter is lumpy.  Pour into 2 greased mini loaf pans.
Bake at 350 degrees F for 55 minutes. I like to add tinfoil to the top for the last 10 minutes.

Simple syrup

Juice of 1 lemon
1/2 cup sugar

Heat on a stove until sugar is dissolved.

As soon as the bread is out of the oven, spoon the syrup over the loaf. The trick is to do this while the bread is still hot so it will soak up the syrup. Let the loaves cool and then enjoy.


If you don't have a mini loaf pan you can either buy a set of 4 disposable pans at most grocery stores or go on Amazon. I purchased mine on Amazon at the below link. I researched many and found these to be the best quality. It comes in a set of 4 but I figure you can never have too many mini loaf pans.

http://www.amazon.com/gp/product/B0047N13JI/ref=oh_details_o07_s00_i01?ie=UTF8&psc=1


Friday, January 31, 2014

Savory Crepes

Friday night my husband makes crepes. I felt I needed to make a filling that was a bit more substantial than his butter, powdered sugar, and lemon juice filling. So this is what I came up with what was in my fridge.

1/2 cup mushrooms
2 tbsp butter
1/4 tsp minced garlic
1/8- 1/4 cup spinach (I used frozen )
1 cup shredded chicken from a rotisserie chicken
2 slices of smoked provolone cheese
shredded parmesan cheese
cream to wet

Sautee the mushrooms in the butter until soft. Then add spinach and cook until thawed, or wilted (if using fresh spinach). Then add all the other ingredients. Add enough cream until there is a slight saucy consistency and just sprinkle the parmesan on top. I would say maybe 1/8 of a cup.


Sorry for the low quality picture. I took it with my iPhone. 

Wrap this up in a freshly made crepe and voila! It's fantastic. 


I think next time I will bake them in a pan smothered in homemade béchamel sauce. 
You could use any cheese you like, really. I bet swiss would be good, with some chopped or sundried tomatoes.  Artichokes and bacon would be really tasty too. It was good just like this and I had all the ingredients in my pantry and fridge. 

Thursday, January 23, 2014

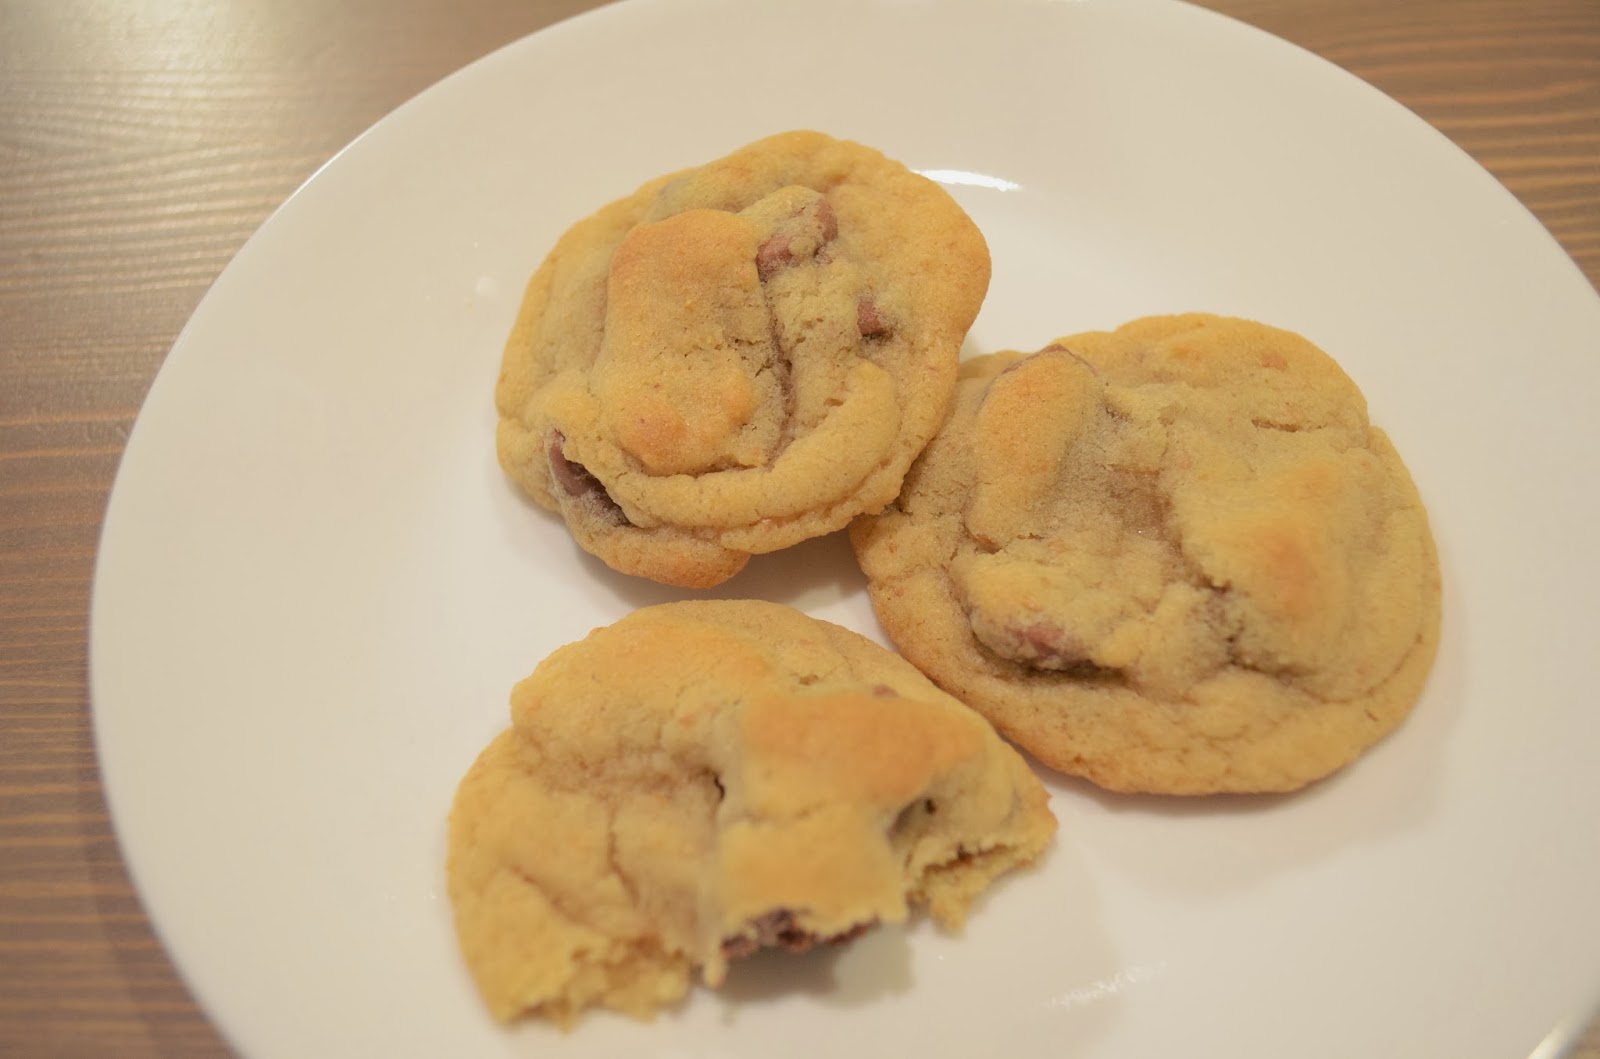
Chocolate Chip Cookies

I went on a 3 week sprint to find the perfect chocolate chip cookie. I tried all kinds of cookies from the internet and accumulated recipes from friends. I finally combined a bunch of them to make what I have decided is the "perfect" chocolate chip cookie.  I don't eat cookie dough, but I have it on good authority that this is exceptional good tasting dough. Here is the recipe, and here goes your figure.

1 cup white sugar
1 cup brown sugar
1 cup butter (softened)
2 large eggs
3 cups flour
1 tsp baking powder
1 tsp baking soda
1/2 tsp salt
1 tsp vanilla
2-3 cups chocolate chips (I prefer guittard)

Preheat oven to 375 degrees F. Cream sugar and butter together. Add eggs, vanilla and salt. In a separate bowl, mix dry ingredients together. Add dry ingredients to wet and mix until just barely combined. Add chocolate chips and mix until incorporated. Place 1 1/2 inch balls on a parchment lined baking sheet.
Bake at 375 for 7-9 minutes depending on the heat of your oven (mine is exactly 8 1/2 minutes).The trick to these cookies is to pull them out before they get browned. They will not look done, but trust me. They are!


Monday, January 20, 2014

Friday Afternoon Lunch

Friday afternoon, I had lunch with a few of my girl friends, and one in particular brought a fantastic salad. I thought I would share the recipe. 

Salad

Spinach and iceberg lettuce
Sliced mushrooms
Cottage cheese
Swiss cheese cubed into 1/4- 1/2 inch pieces
Chopped cooked bacon


Poppyseed Dressing

1/2 c onion finely chopped
2/3 cup vinegar
2 tsp salt
1 1/2 c sugar
2 tsp powdered mustard
1 c vegetable oil (I like using extra light tasting olive oil)